Ship a ChatGPT App in 2 Commands (September 2026)
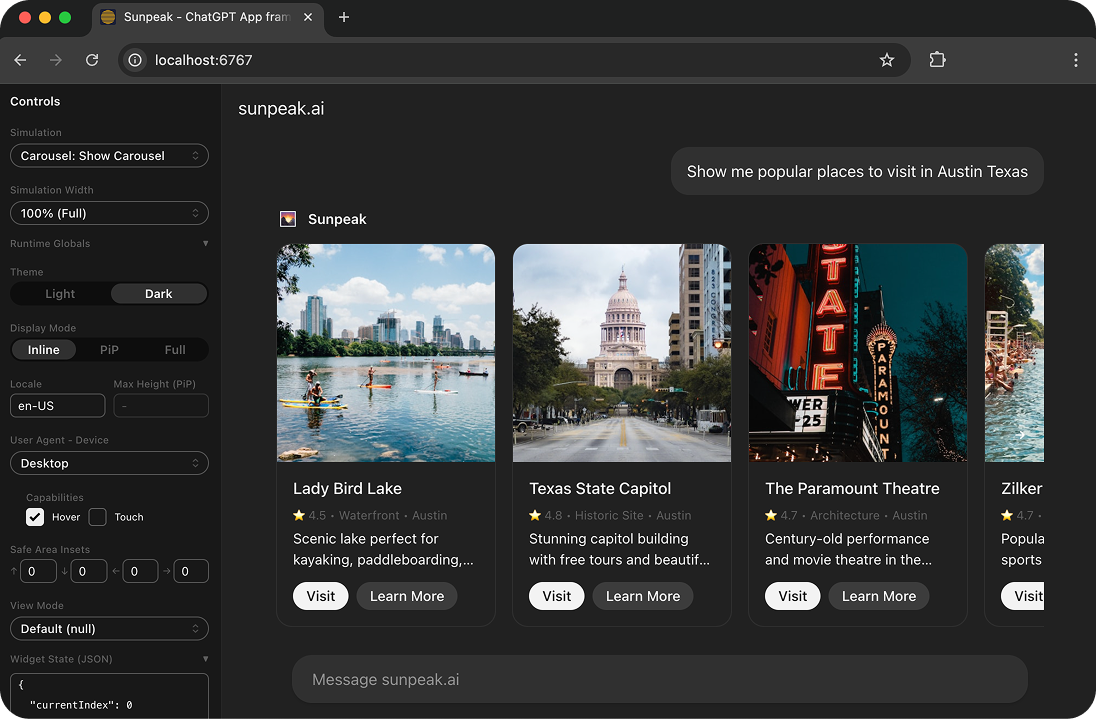
The default carousel ChatGPT App built and deployed with sunpeak.
You can go from an empty directory to a working ChatGPT App in two commands:
npx sunpeak new sunpeak-app
cd sunpeak-app && pnpm dev
Those commands create and run the local app. Public release still needs a production MCP endpoint, security checks, real-host testing, and a plugin submission when you want directory distribution.
TL;DR: Run npx sunpeak new sunpeak-app, then cd sunpeak-app && pnpm dev. The scaffold includes tools, React Views, simulations, tests, and a local ChatGPT runtime. Build the MCP contract before polishing the UI, use deterministic browser tests for most coverage, connect ChatGPT only after the local app is stable, and deploy a public Streamable HTTP endpoint before submission.
What the Two Commands Create
The first command asks which example resources you want, creates the project, and installs the framework around a normal TypeScript app. The second starts two services with hot reload:
| Service | Default URL | Purpose |
|---|---|---|
| sunpeak Inspector | http://localhost:3000 | Render and test the app in local host replicas |
| MCP server | http://localhost:8000/mcp | Expose tools and resources to MCP clients |
The generated project follows a convention-based layout:
sunpeak-app/
  src/
    resources/
      albums/
        albums.tsx
    tools/
      show-albums.ts
    server.ts
  tests/
    simulations/
      show-albums.json
    e2e/
      albums.spec.ts
    live/
      albums.spec.ts
    evals/
      albums.eval.ts
  playwright.config.ts
  package.json
Tools, resources, and simulations are discovered from those folders, so you do not maintain a registration index for every file. The scaffold also includes scripts for unit, E2E, visual, live, and eval tests.
A ChatGPT App Is an MCP App
OpenAI’s current plugin UI guide starts with the open MCP Apps standard. A ChatGPT App has three runtime parts:
- An MCP server that declares tools and UI resources.
- A sandboxed View that renders the app interface.
- ChatGPT, which chooses tools and brokers messages between the server and View.
A tool can work without UI. When the workflow benefits from a table, form, map, review screen, or visual result, the tool declares a ui:// resource in _meta.ui.resourceUri. The host fetches the HTML and opens it in an iframe. The View and host then communicate with ui/* JSON-RPC messages over postMessage.
Use the shared MCP Apps fields first:
| Need | MCP Apps path | ChatGPT compatibility path |
|---|---|---|
| Link a tool to UI | _meta.ui.resourceUri | _meta["openai/outputTemplate"] |
| Receive tool input | ui/initialize and tool-input notifications | window.openai.toolInput |
| Receive tool result | ui/notifications/tool-result | window.openai.toolOutput |
| Call a server tool | tools/call | window.openai.callTool |
| Ask for a follow-up message | ui/message | window.openai.sendFollowUpMessage |
ChatGPT-only APIs still help with file handling, checkout, and host-owned modals. Put them behind capability checks and keep a fallback. The MCP Apps client matrix changes as hosts add features, so testing a capability is more reliable than branching on a host name.
Command 1: Scaffold the App
You need Node.js 20 or newer. Run:
npx sunpeak new sunpeak-appYou can also choose the starter resources without an interactive prompt:
npx sunpeak new sunpeak-app review,carouselThe scaffold gives you working examples, but your first product decision is still the tool boundary. A good first tool has one clear user intent, a small input schema, an explicit output schema, and honest safety annotations.
Here is the current sunpeak tool-file pattern:
import { z } from 'zod';
import type { AppToolConfig, ToolHandlerExtra } from 'sunpeak/mcp';

export const tool: AppToolConfig = {
  resource: 'orders',
  title: 'Show recent orders',
  description: 'Find recent orders for the signed-in account and open an order list.',
  annotations: {
    readOnlyHint: true,
    destructiveHint: false,
    openWorldHint: false,
  },
  _meta: {
    ui: { visibility: ['model', 'app'] },
  },
};

export const schema = {
  limit: z.number().int().min(1).max(50).describe('Maximum orders to return'),
};

export const outputSchema = {
  orders: z.array(
    z.object({
      id: z.string(),
      total: z.number(),
      status: z.enum(['open', 'paid', 'cancelled']),
    })
  ),
};

type Args = z.infer<z.ZodObject<typeof schema>>;

export default async function ({ limit }: Args, _extra: ToolHandlerExtra) {
  const orders = await listOrders({ limit });

  return {
    content: [{ type: 'text' as const, text: `Found ${orders.length} orders.` }],
    structuredContent: { orders },
  };
}
The tool result has separate audiences. Keep content concise and useful to the model. Make structuredContent match outputSchema. Use result _meta for app-facing metadata that should not become narration, but never use it as secret storage because it reaches the View.
Define the UI Resource
The resource file combines metadata with a React component:
import { SafeArea, useToolData } from 'sunpeak';
import type { ResourceConfig } from 'sunpeak';

interface OrderResult {
  orders: Array<{
    id: string;
    total: number;
    status: 'open' | 'paid' | 'cancelled';
  }>;
}

export const resource: ResourceConfig = {
  title: 'Recent orders',
  description: 'Review recent orders for the signed-in account.',
  mimeType: 'text/html;profile=mcp-app',
  _meta: {
    ui: {
      csp: {
        resourceDomains: ['https://cdn.example.com'],
      },
    },
  },
};

export function OrdersResource() {
  const { output, isLoading, isError } = useToolData<unknown, OrderResult>();

  if (isLoading) return <p>Loading orders...</p>;
  if (isError) return <p>Orders could not be loaded.</p>;
  if (!output?.orders.length) return <p>No recent orders.</p>;

  return (
    <SafeArea className="p-4">
      <h1>Recent orders</h1>
      <ul>
        {output.orders.map((order) => (
          <li key={order.id}>
            {order.id}: ${order.total.toFixed(2)} ({order.status})
          </li>
        ))}
      </ul>
    </SafeArea>
  );
}
Declare every production asset and connection origin in the resource CSP. The iframe sandbox is a real browser boundary, so CORS, CSP, permissions, external links, and responsive layout are part of the app contract.
Command 2: Start the Local Runtime
Run:
cd sunpeak-app && pnpm devOpen http://localhost:3000. The sunpeak Inspector lets you:
- Switch between ChatGPT and Claude-style runtimes.
- Call a real tool handler or load a simulation.
- Change light and dark themes.
- Test inline, fullscreen, and other advertised display modes.
- Resize to mobile, tablet, and desktop presets.
- Inspect tool input, results, app state, and host context.
- See UI changes through HMR without refreshing a real host.
The default development mode uses simulation data when a fixture is selected. Run sunpeak dev --prod-tools to call real handlers, sunpeak dev --prod-resources to load built UI resources, or both for a local production smoke test.
Pin the First Useful States
Live API data makes poor UI test input because accounts, permissions, records, and timing change. Put representative states in tests/simulations/*.json:
{
  "tool": "show-orders",
  "userMessage": "Show my recent orders",
  "toolInput": {
    "limit": 10
  },
  "toolResult": {
    "content": [
      { "type": "text", "text": "Found one order." }
    ],
    "structuredContent": {
      "orders": [
        { "id": "ORDER-1042", "total": 79.5, "status": "paid" }
      ]
    }
  }
}
Add separate fixtures for empty, loading, error, authorization-required, long-text, and large-result states. Add confirmation, cancellation, repeated-call, and partial-failure states when the app changes data.
Test the MCP Contract Before the View
A blank iframe often starts with a server contract bug. Test discovery and tool calls first:
import { expect, test } from 'sunpeak/test';

test('orders tool exposes the expected contract', async ({ mcp }) => {
  const tools = await mcp.listTools();
  const showOrders = tools.find((item) => item.name === 'show-orders');

  expect(showOrders).toBeDefined();
  expect(showOrders?.annotations).toMatchObject({
    readOnlyHint: true,
    destructiveHint: false,
  });
  expect(showOrders?.outputSchema?.properties).toHaveProperty('orders');
  expect(showOrders?._meta?.ui?.resourceUri).toMatch(/^ui:\/\//);

  const result = await mcp.callTool('show-orders', { limit: 10 });
  expect(result.isError).toBeFalsy();
  expect(result.structuredContent).toMatchObject({
    orders: expect.any(Array),
  });
});
Then render the user-facing path:
test('recent orders render in dark mode', async ({ inspector }) => {
  const result = await inspector.renderTool(
    'show-orders',
    { limit: 10 },
    { theme: 'dark', displayMode: 'inline' }
  );

  expect(result).not.toBeError();
  const app = result.app();

  await expect(app.getByRole('heading', { name: 'Recent orders' })).toBeVisible();
  await expect(app.getByText('ORDER-1042')).toBeVisible();
});
Host selection belongs to the Playwright project, not a host option on renderTool(). The default sunpeak config can run the same test in separate ChatGPT and Claude projects.
Before connecting a real account, cover:
- Tool discovery, schemas, resource links, annotations, and errors.
- Success, empty, partial, slow, unauthorized, and failed results.
- Keyboard access, focus, accessible names, and contrast.
- Theme, display-mode, safe-area, and viewport changes.
- View-initiated tool calls and capability fallbacks.
- Production resources with
prodResources: true. - Console errors, failed requests, broken assets, and horizontal page overflow.
Run the complete suite:
pnpm test
pnpm build
The scaffold also exposes pnpm test:unit, pnpm test:e2e, pnpm test:visual, pnpm test:live, and pnpm test:eval when you need a narrower layer.
Connect the App to ChatGPT
ChatGPT cannot connect directly to localhost. OpenAI’s current connection guide supports a public HTTPS Streamable HTTP endpoint, a development forwarding service, or Secure MCP Tunnel when your workspace has it.
For a basic development URL:
ngrok http 8000Append /mcp to the forwarding URL. Then:
- Enable Developer mode. The location depends on plan and workspace policy. OpenAI currently documents both Settings > Security and login and workspace-controlled app settings.
- Open ChatGPT Plugins and select the plus button.
- Enter a user-facing name and description.
- Choose the connection method and provide the full
/mcpURL or tunnel ID. - Review every discovered tool, schema, annotation, and auth requirement.
- Start a new conversation with the app enabled.
Test direct prompts, natural paraphrases, follow-ups, ambiguous requests, writes that need approval, and requests that should not call a tool. Record the selected tool, arguments, result, and confirmation behavior.
After changing tool names, descriptions, schemas, annotations, auth, or UI resources, refresh the development connection and start a new conversation. ChatGPT caches discovered metadata. Published plugins use reviewed metadata snapshots, so published metadata changes need a new version.
Build and Deploy the Production Server
Build locally:
pnpm build
pnpm start
The development server is not a production deployment. Your production environment needs:
- A stable HTTPS origin and Streamable HTTP MCP endpoint.
- Authentication and per-user authorization when the app handles private data.
- Correct OAuth discovery and refresh behavior when using OAuth.
- Exact CSP and CORS policies for the View.
- Server-side validation for every input and side effect.
- Logs and traces that omit secrets and unnecessary personal data.
- Health checks, timeouts, retry policy, and a rollback path.
Test the same production artifact you deploy. A useful final local check renders with prodResources: true, then calls the running server through MCP. The real-host smoke check should prove connection, tool selection, auth, the main View, one action, and one error path.
If you already have an MCP server in TypeScript, Python, Go, or Rust, keep it. Add the test harness without moving the implementation:
npx sunpeak test init --server https://your-app.example.com/mcp
npx sunpeak test
Publish Through a Plugin
OpenAI now uses plugins as the distribution package for ChatGPT and Codex capabilities. A plugin can contain a remote MCP server, skills, or both. Your app still runs from its MCP server. The plugin is the installable listing and packaging layer around it.
Use Developer mode for private or workspace testing. For public review, OpenAI’s current submission guide says to:
- Open the plugin submission portal and choose With MCP.
- Provide the stable public production endpoint.
- Scan the server and resolve metadata or auth errors.
- Verify publisher identity and control of the MCP domain.
- Declare exact CSP domains and accurate tool annotations.
- Add listing copy, starter prompts, availability, and release notes.
- Provide five positive and three negative test cases.
- Supply reviewer credentials that do not need MFA, SMS, email confirmation, VPN, or private-network access.
The two-command start is useful because it moves contract and UI failures into a local loop. It does not remove the release work that protects users.
Test the Broader MCP Apps Ecosystem
The official MCP Apps overview lists several clients that can render interactive Views. Support still differs by client, version, plan, device, and workspace policy.
Build the shared contract first:
ui://resources andtext/html;profile=mcp-app._meta.ui.resourceUriand resource security metadata.content,structuredContent, result_meta, andisError.- The
ui/*iframe bridge. - Capability checks and useful text fallbacks.
Then isolate optional host features. A ChatGPT file picker or host-owned modal should not make the rest of the app unusable in Claude or another MCP Apps host. The sunpeak Inspector runs the same View in ChatGPT and Claude-style replicas, and the Playwright config turns that comparison into a repeatable CI check.
Common First-Run Failures
| Symptom | Check first |
|---|---|
| Tool does not appear | Tool file location, export shape, schema validity, and metadata refresh |
| Tool is never selected | Name, description, argument descriptions, and negative overlap with other tools |
| View does not open | _meta.ui.resourceUri, resource registration, MIME type, and resource read response |
| View is blank | Browser console, tool-result shape, CSP, asset URLs, and iframe errors |
| Local works, ChatGPT fails | Public reachability, Streamable HTTP, auth discovery, cached metadata, and production resource paths |
| Write flow is unsafe | Server authorization, annotations, preview, confirmation, idempotency, and partial-failure handling |
| Mobile layout clips | Viewport constraints, safe areas, long text, tables, and code or media overflow |
Diagnose in that order because it follows the request path: discovery, tool choice, result, resource, browser, and side effect.
A Small Release Checklist
- The two commands create and run the app on Node.js 20 or newer.
- Tools and resources are discoverable through MCP.
-
structuredContentmatchesoutputSchema. - Tool annotations match real reads, writes, and external effects.
- The View handles loading, empty, error, cancelled, and normal states.
- ChatGPT and Claude-style replicas pass the supported UI matrix.
- The production resource passes Playwright checks with no first-party errors.
- The HTTPS MCP endpoint, OAuth flow, and clean-account connection work.
- Direct, indirect, follow-up, and negative tool-selection prompts pass.
- Published metadata, CSP, reviewer access, and test cases are ready.
Start with the sunpeak quickstart when you are building a new app. Use the MCP App testing framework when the server already exists and you need local host coverage before changing its architecture.
Get Started
npx sunpeak newFurther Reading
- ChatGPT App tutorial - full walkthrough
- How to build a ChatGPT App
- MCP App testing strategy
- MCP App tool metadata and UI resource links
- MCP App capability detection and fallbacks
- How to submit a ChatGPT App as a plugin
- ChatGPT App framework
- sunpeak quickstart
- OpenAI plugin MCP server guide
- OpenAI guide to adding ChatGPT UI
- OpenAI guide to connecting and testing a plugin
- OpenAI plugin submission guide
- Official MCP Apps overview
- MCP Apps client support matrix
Frequently Asked Questions
What are the two commands to create a ChatGPT App?
Run npx sunpeak new sunpeak-app to create the project, then run cd sunpeak-app && pnpm dev to start it. The first command scaffolds the MCP server, React resources, tools, simulations, and tests. The second starts the local Inspector and MCP endpoint with hot reload.
Can two commands publish a ChatGPT App to everyone?
No. Two commands give you a working local app and test environment. Public release still requires a stable HTTPS MCP deployment, authentication and security checks, real-host testing, publisher and domain verification, accurate listing details, and OpenAI review through a With MCP plugin submission.
Can I build a ChatGPT App without a paid ChatGPT account?
Yes for local development and automated tests. The sunpeak Inspector replicates ChatGPT and Claude-style MCP App runtimes, so tools, resources, themes, display modes, simulations, and responsive states can run locally and in CI without a host account or model credits. Real ChatGPT connection and distribution depend on current plan and workspace policy.
What does ChatGPT call when it runs an app?
ChatGPT calls tools exposed by the app MCP server. A tool can return model-readable content, typed structuredContent that matches outputSchema, and result _meta for the View. If the tool declares _meta.ui.resourceUri, ChatGPT can fetch that UI resource and render it in a sandboxed iframe.
How do I connect a local ChatGPT App to ChatGPT?
Enable Developer mode when your plan and workspace allow it, then add the MCP server from ChatGPT Plugins. Use a public HTTPS URL ending in /mcp, a development forwarding URL, or OpenAI Secure MCP Tunnel when available. Review the discovered tools before testing prompts.
What should I test before deploying a ChatGPT App?
Test tools/list, resources/list, resources/read, tool calls, output schemas, annotations, auth errors, and UI resource metadata. Render success, empty, error, dark, mobile, and fullscreen states in Playwright. Run a production-resource test, then use a small real-host suite for connection, tool selection, OAuth, confirmation, and metadata refresh.
Are ChatGPT Apps the same as MCP Apps?
A ChatGPT App is an MCP-backed app running in ChatGPT. New interactive UI should use the open MCP Apps resource and bridge fields first, then add ChatGPT-only capabilities such as file APIs, checkout, or host-owned modals behind feature checks. This keeps the core app portable across compatible hosts.
How are ChatGPT Apps distributed in 2026?
OpenAI distributes public app experiences through plugins. A plugin can contain a remote MCP server, skills, or both. For an app backed by MCP, create a With MCP submission using a stable public HTTPS endpoint. Private workspace apps can stay in Developer mode without public submission.